In the modern digital age, USB drives are indispensable tools for storing and transferring data. However, they are not immune to occasional issues that can render them unreadable or inaccessible. Whether it’s due to corruption, formatting problems, or other errors, the need to repair and recover data from a USB drive can be a common occurrence.
In this comprehensive tutorial, we will guide you through the process of repairing and recovering a USB drive using the powerful DiskPart utility in Windows. DiskPart is a command-line tool that allows you to manage disks, partitions, and volumes with precision and control. While it is a valuable tool, it should be used with caution, as any incorrect commands can result in data loss. Therefore, it’s essential to back up your important data before attempting any repairs.
We will provide you with a step-by-step guide, explaining each command in detail, to ensure that you can confidently repair your USB drive and potentially recover lost data. Whether you are a novice or an experienced user, this tutorial will equip you with the knowledge and skills to rescue your USB drive and get back to your important data safely.
Let’s begin the journey of restoring functionality to your USB drive and recovering your precious files using DiskPart in Windows.
Important: Before you begin, make sure to back up any important data on the USB drive.
Step 1: Open Command Prompt as an Administrator
- Press
Win + Xand select “Windows Terminal (Admin)” or “Command Prompt (Admin)” from the menu. This will open a Command Prompt window with administrative privileges.
Step 2: Launch DiskPart
- In the Command Prompt, type
diskpartand press Enter. This will start the DiskPart utility.
Step 3: List Disks
- Type
list diskand press Enter. This command will display a list of all the disks attached to your computer.
Step 4: Select the USB Drive
- Look for the USB drive in the list of disks. Identify it by its size. Be very careful at this stage to select the correct disk. If you choose the wrong disk, you may lose data from the selected disk.
- To select the USB drive, type
select disk Xwhere “X” is the number of the USB drive you want to work with.Double-check to make sure you’ve selected the correct disk.
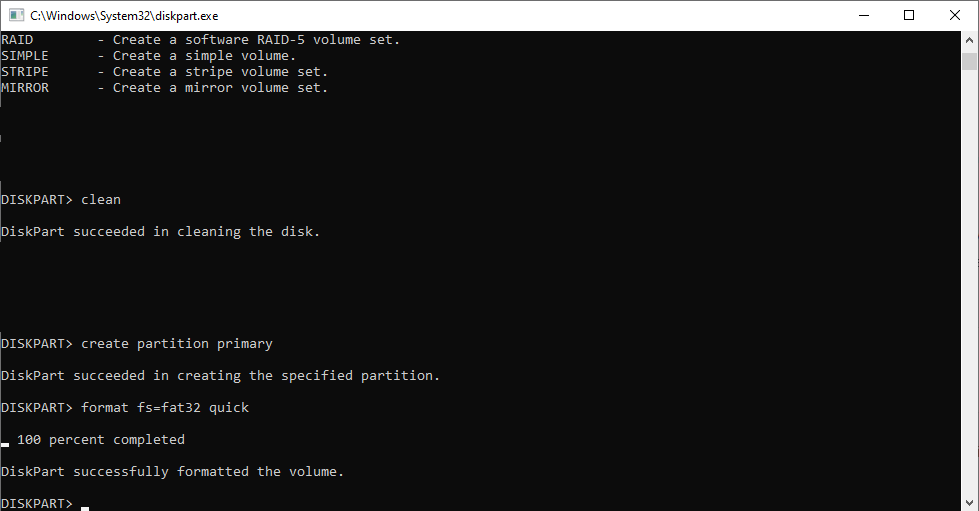
Step 5: Clean the USB Drive
- Once you’ve selected the USB drive, type
cleanand press Enter. This command will remove all partitions and data from the USB drive.
Step 6: Create a New Partition
- Type
create partition primaryand press Enter. This command will create a new primary partition on the USB drive.
Step 7: Format the Partition
- To format the partition, type
format fs=fat32 quickand press Enter. You can replace “fat32” with “ntfs” or “exfat” if you prefer a different file system. The “quick” option will perform a fast format. This will erase any data on the USB drive.
Step 8: Assign a Drive Letter
- To assign a drive letter to the newly created partition, type
assignand press Enter.
Step 9: Exit DiskPart
- Type
exitand press Enter to exit the DiskPart utility.
Step 10: Close Command Prompt
- Type
exitand press Enter to close the Command Prompt window.
Now, your USB drive should be repaired and formatted. You can copy your data back to the USB drive if you have a backup.